Posting Using Buffer – How To Get Large Images In Posts Bigger Using Buffer Scheduler

When it comes to organizing and planning your social media posts, there are great online scheduling programs out there like Buffer and Hootsuite.
As for scheduling Buffer posts, it’s important to know just how those posts are going to show up.
Will they have an image? Will the image be small or large? Will there be a link text? Is there a description or header attached?
When it comes to posting, images grab attention and that’s what you want to make sure each of yours has.
We’ve gone through the different scenarios for you to show how posting with Buffer appears with just text and a link or if you add your own image.
Get Perfect Buffer Post Images
We did some trial and error to find the best ways to show an image by either posting with “Text and Link” or posting “Text and Link and Uploading an Image”. See the below table for the checkmark next to our favorite results. NOTE: We felt either way showed nicely for Google+.
Example Buffer Posts
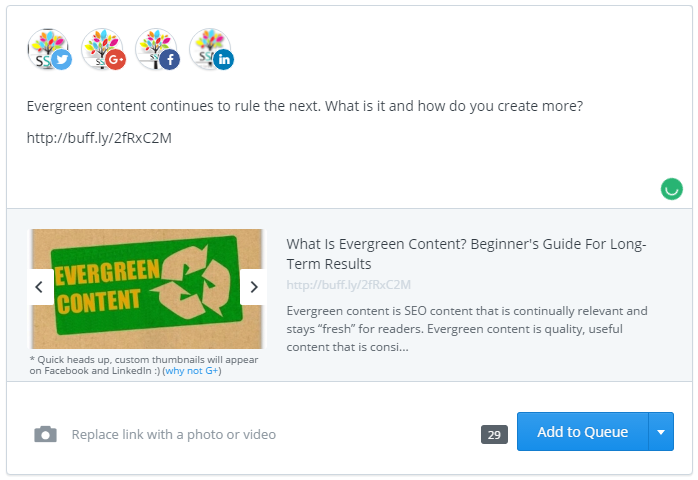
Example Post text:
Evergreen content continues to rule the next. What is it and how do you create more?
http://buff.ly/2fp6dRG
Here is what the snippet looks like just posting the text and link to all using the Buffer app.
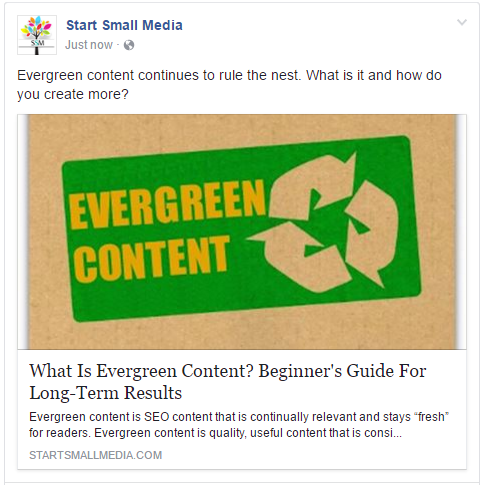
Posting to Facebook From Buffer
Let’s look at Facebook posts using Buffer
If you simply add text, the link and choose one of the images, it will appear as the first image, as long as you have a featured image attached to the page or post. If you replace the image it will appear as the second image shown.
 VS
VS 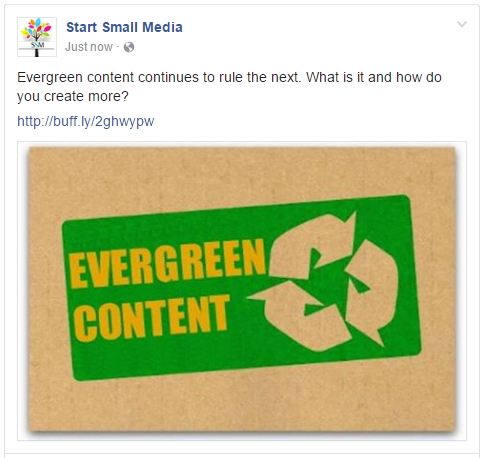
What we don’t like about uploading a new image is that there is no Headline, Description or custom Link at the bottom.
Winner: Leave as text and link without adding an image.
Posting to Twitter From Buffer
Now, let’s look at Twitter posts using Buffer.
If you just type in the text, the link, and choose 1 of the images presented you get the first image. If you choose to upload your own photo, it will appear as the second image.
 VS
VS 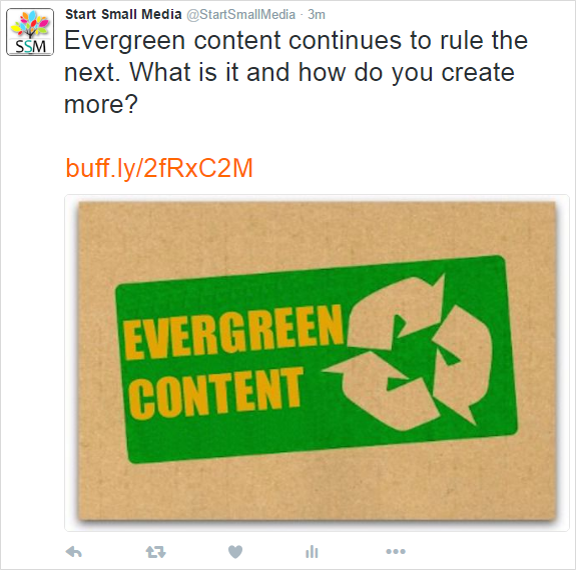
Winner: Upload an Image
The image is much larger and far more attractive to Twitter scrollers.
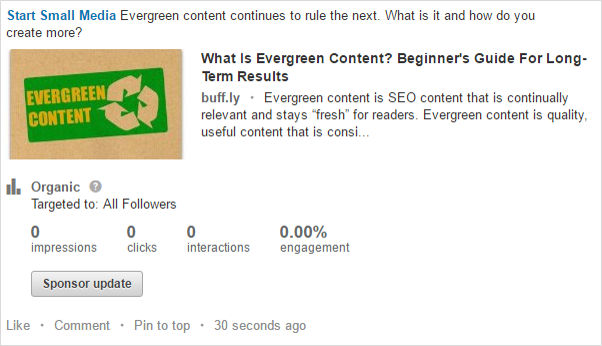
Posting to LinkedIn from Buffer
Posting to Linked in from Buffer is similar to Facebook and Twitter. By posting only the text and link, you will get an
 VS
VS 
Winner: No uploaded image
We like how the text and link pull all the information. The only downfall is that the image is a bit smaller, however, it still looks fine.
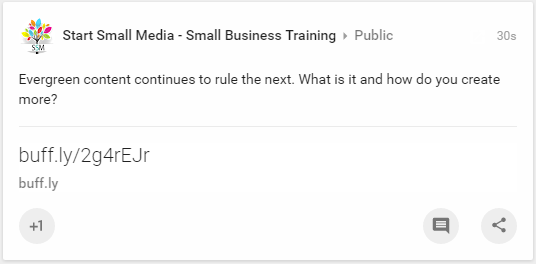
Posting to Google+ From Buffer
We love to have the option to post from Google+ from Buffer. For one reason, we rarely utilize this free source. And two, Google loves Google so, of course, anything posting to Google+ will help your posts get ranked better, so long as it’s used.
When posting only a text and link, you will see that the first image shows that an image isn’t even pulled. What gives, Google+? The second image is when you upload a picture into Buffer.
 VS
VS 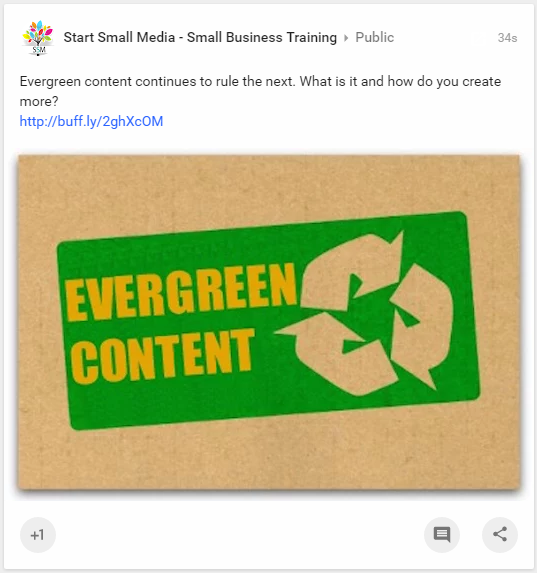
Winner: Upload an image.
Overview of Images Using Buffer to Post
After testing out these various results, we came up with this little guide.
Facebook : Text and Link
LinkedIn: Text and Link
Twitter: Text, Link, Upload Image
Google+: Text, Link, Upload Image
We hope this helps! Tell us what you think about Buffer scheduling and if you use any type of scheduling programs.


Read Articles About Small Business Marketing
 Read more +12 December 2024 in Blog, Link Building, Page rank, Website
Social Sales Best Practices for Social Media Selling
 Read more +18 December 2023 in Blog, Content, Google Analytics, Online Tools, Page rank, Pagerank, SEO, Website
How To Index a Website Page: Google Indexing – Crawl vs Index vs Rank
 Read more +24 November 2023 in Blog, Link Building, Page rank, Website
Why Use Nofollow Link Tag on Outgoing Links?